Hello Tanvas
This tutorial will walk you through creating a WPF C# application for rendering haptic effects on your TanvasTouch Dev Kit display.
Prerequisites
- Windows 10 64-bit
- TanvasTouch SDK 3.0.0
- Visual Studio 2019 with .NET 5 or .NET Core 3.1
Create the project
- Open Visual Studio. Select File > New > Project...
- Select WPF App (.NET) or WPF App (.NET Core) and click Next.
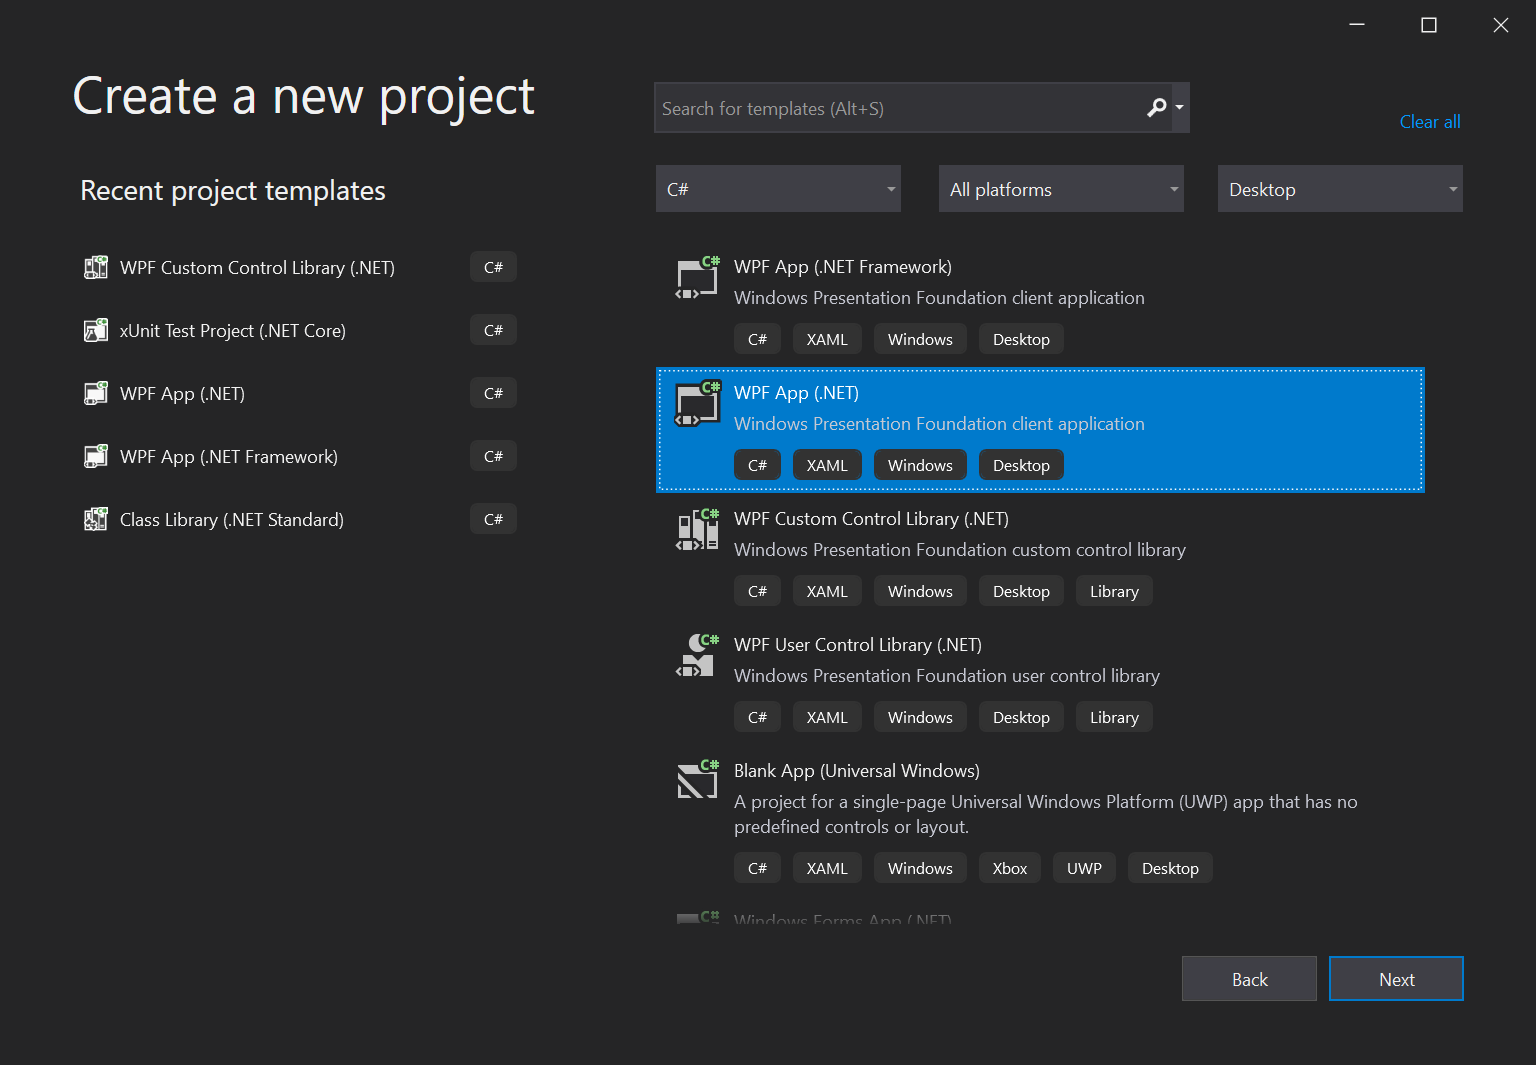
- Enter the project name
HelloTanvasand click Create.
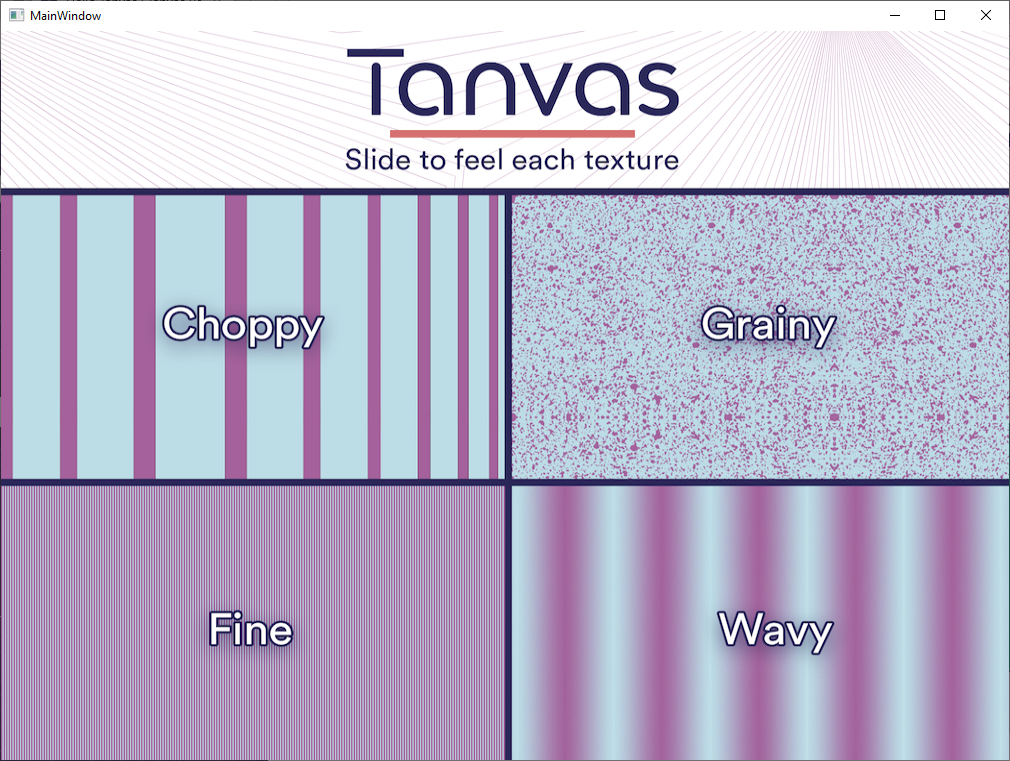
Run the application by clicking the Start button at the top of the Visual Studio window, which will contain the text ▶️ HelloTanvas. A blank window titled "MainWindow" should appear on the desktop as shown below.

Stop the program before continuing to the next step.
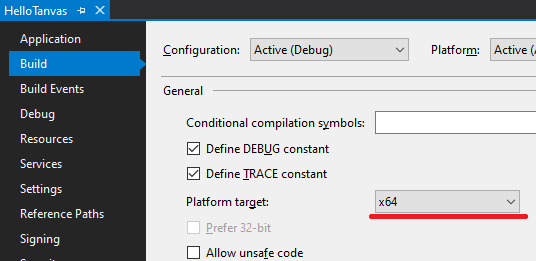
Set the platform target
- In Solution Explorer, right-click on HelloTanvas. Select Properties.
- In the Build section, set Platform target to x64.
Import the TanvasTouch API into the project
The TanvasTouch .NET API is shipped as a NuGet package. It is available from the NuGet Gallery and is also shipped with the TanvasTouch SDK. This tutorial will use the NuGet Gallery.
- In Visual Studio, select Tools > NuGet Package Manager > Manage NuGet Packages for Solution.... You will see NuGet's Manage Packages for Solution tab.
- Set the Package source dropdown to
nuget.org. - Select the Browse tab.
- Type
Tanvas.TanvasTouchinto the search box. You should seeTanvas.TanvasTouchandTanvas.TanvasTouch.WpfUtilitiesappear in the search results.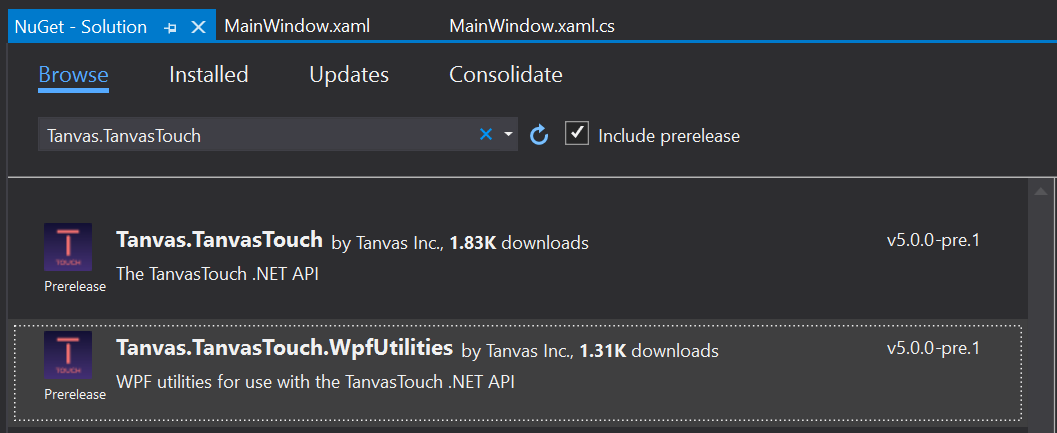
- Select
Tanvas.TanvasTouch.WpfUtilities. - Check the checkbox next to the
HelloTanvasproject in the right-side pane.
- Press Install. You may be asked to review and agree to the TanvasTouch SDK license agreement.
Add the Hello Tanvas assets to the project
- In
MainWindow.xaml, set the window size to 1024 x 768 pixels.
    <Window x:Class="HelloTanvas.MainWindow"
        xmlns="http://schemas.microsoft.com/winfx/2006/xaml/presentation"
        xmlns:x="http://schemas.microsoft.com/winfx/2006/xaml"
        xmlns:d="http://schemas.microsoft.com/expression/blend/2008"
        xmlns:mc="http://schemas.openxmlformats.org/markup-compatibility/2006"
        xmlns:local="clr-namespace:HelloTanvas"
        mc:Ignorable="d"
        Title="HelloTanvas" Width="1024" Height="768">
- In the Solution Explorer, right-click on HelloTanvas. Select Add > New Folder. Name the folder Assets.
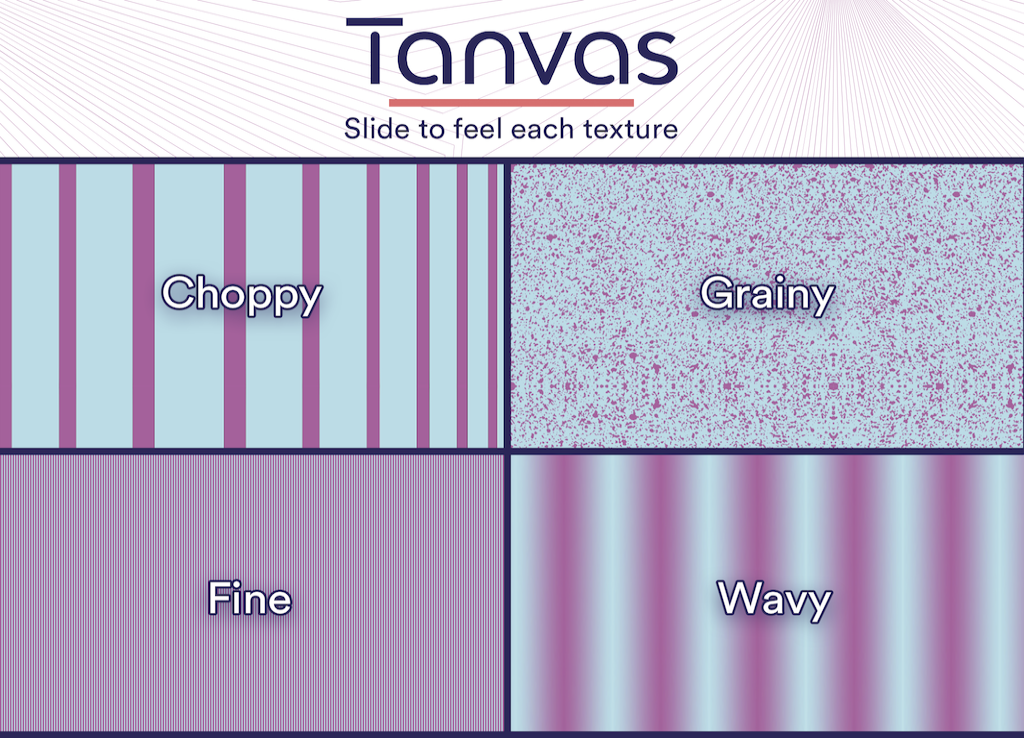
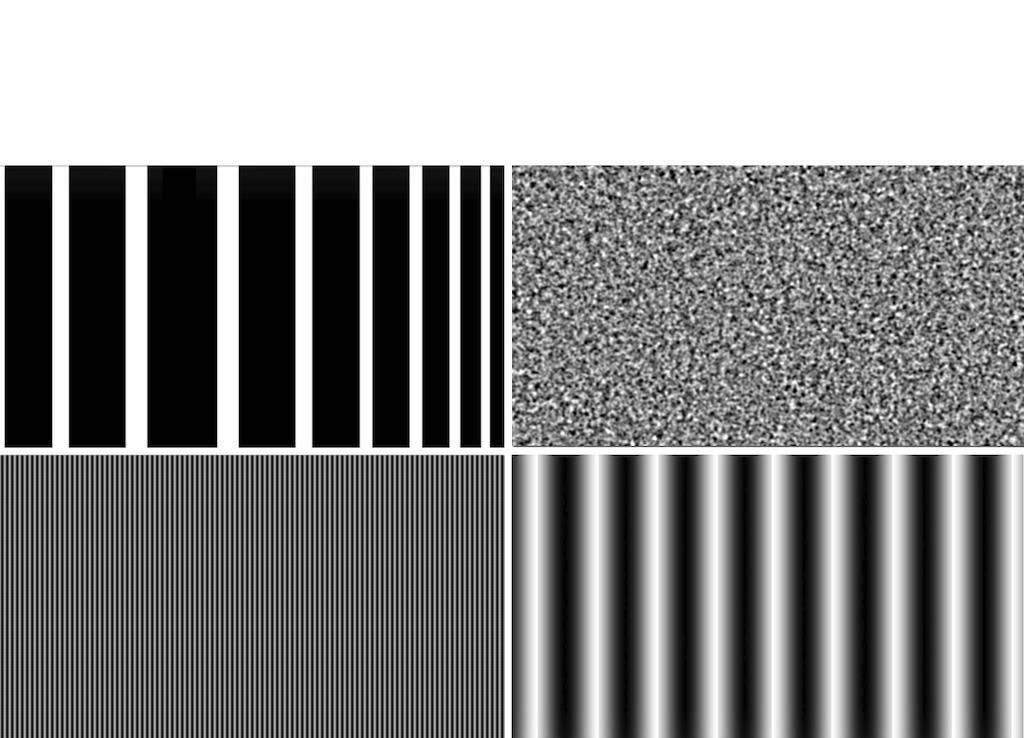
- Copy the Hello Tanvas picture and the haptic map into the Assets folder.
- Right-click on Assets\HelloTanvas_haptics.png. Select Properties. Change the Build Action for this file to Resource.
- Repeat step 4 for Assets\HelloTanvas_visual.png.
- In
MainWindow.xaml, add the following code:
   <Grid>
       <Image Source="Assets/HelloTanvas_visual.png" Width="1024" Height="738" Margin="0" VerticalAlignment="Top" HorizontalAlignment="Left"/>
   </Grid>
Initialize the API
In MainWindow.xaml.cs:
- Near the top of the file, import the TanvasTouch .NET API classes:
using Tanvas.TanvasTouch.Resources;
using Tanvas.TanvasTouch.WpfUtilities;
- Add the following code to
MainWindow's constructor:
InitializeComponent();
Tanvas.TanvasTouch.API.Initialize();
Add code to create haptic resources
- Add an event handler for the
Loadedevent inMainWindow.xaml.
<Window x:Class="HelloTanvas.MainWindow"
        xmlns="http://schemas.microsoft.com/winfx/2006/xaml/presentation"
        xmlns:x="http://schemas.microsoft.com/winfx/2006/xaml"
        xmlns:d="http://schemas.microsoft.com/expression/blend/2008"
        xmlns:mc="http://schemas.openxmlformats.org/markup-compatibility/2006"
        xmlns:local="clr-namespace:HelloTanvas"
        mc:Ignorable="d"
        Title="HelloTanvas" Width="1024" Height="768"
        Loaded="Window_Loaded">
- Add the following fields to the
MainWindowclass:
        TanvasTouchViewTracker viewTracker;

        TView myView
        {
            get
            {
                return viewTracker.View;
            }
        }
- Implement
Window_LoadedinsideMainWindow.xaml.csas follows:
        private void Window_Loaded(object sender, RoutedEventArgs e)
        {
            viewTracker = new TanvasTouchViewTracker(this);

            var uri = new Uri("pack://application:,,/Assets/HelloTanvas_haptics.png");
            var mySprite = PNGToTanvasTouch.CreateSpriteFromPNG(uri);

            myView.AddSprite(mySprite);
        }
Verify that your app is communicating with the TanvasTouch Engine
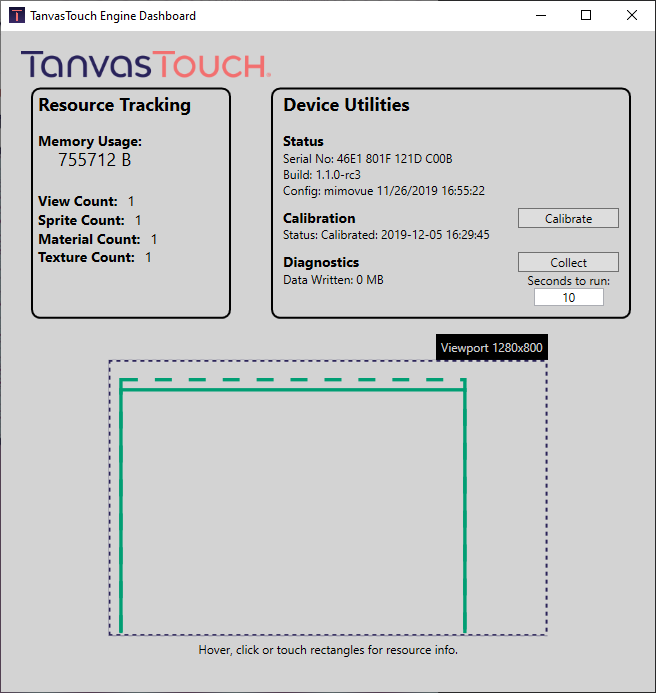
- Outside Visual Studio, launch the TanvasTouch Engine, or double-click the system tray icon if it is already running so the dashboard is visible.
- Verify that the viewport size is 1200x800, matching that of the TanvasTouch Dev Kit display. If not, make sure the display is set as your main display.
- Click the Start button at the top of the window in Visual Studio to launch your application.
- If the Hello Tanvas application does not appear on the TanvasTouch Dev Kit display, drag it to that display.
- Verify the following:
- View, Sprite, Material, and Texture count is 1 in the upper left corner of the dashboard.
- A solid or dashed rectangle appears in the dashboard viewport showing Hello Tanvas' TView instance.
Enabled views show up as solid rectangles; disabled views show up as dashed rectangles. - The rectangle moves with the location and size of the window.
Test your app
Launch your app using the Start button at the top of the screen. You should see a rectangle in the dashboard where the sprite is active. Make sure the window is displayed on the TanvasTouch Dev Kit display and run your finger across the surface to feel the haptics!
Code listings
MainWindow.xaml
<Window x:Class="HelloTanvas.MainWindow"
        xmlns="http://schemas.microsoft.com/winfx/2006/xaml/presentation"
        xmlns:x="http://schemas.microsoft.com/winfx/2006/xaml"
        xmlns:d="http://schemas.microsoft.com/expression/blend/2008"
        xmlns:mc="http://schemas.openxmlformats.org/markup-compatibility/2006"
        xmlns:local="clr-namespace:HelloTanvas"
        mc:Ignorable="d"
        Title="HelloTanvas" Height="768" Width="1024" Loaded="Window_Loaded">
    <Grid>
        <Image Source="Assets/HelloTanvas_visual.png" Width="1020" Height="738" Margin="0" VerticalAlignment="Top" HorizontalAlignment="Left"/>
    </Grid>
</Window>
MainWindow.xaml.cs
using System;
using System.Windows;

using Tanvas.TanvasTouch.Resources;
using Tanvas.TanvasTouch.WpfUtilities;

namespace HelloTanvas
{
    /// <summary>
    /// Interaction logic for MainWindow.xaml
    /// </summary>
    public partial class MainWindow : Window
    {
        TSprite mySprite;
        TanvasTouchViewTracker viewTracker;

        TView myView
        {
            get
            {
                return viewTracker.View;
            }
        }

        public MainWindow()
        {
            InitializeComponent();
            Tanvas.TanvasTouch.API.Initialize();
        }

        private void Window_Loaded(object sender, RoutedEventArgs e)
        {
            viewTracker = new TanvasTouchViewTracker(this);

            var uri = new Uri("pack://application:,,/Assets/HelloTanvas_haptics.png");
            var mySprite = PNGToTanvasTouch.CreateSpriteFromPNG(uri);

            myView.AddSprite(mySprite);
        }
    }
}